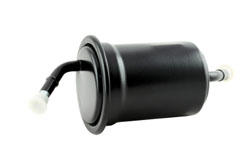
The fuel filter is located between the fuel tank and the fuel pump, and removes impurities that prevent your car from running smoothly -- a clogged filter can lead to a "coughing" engine, and even a complete shutdown.
Depending on your car model, replacing a fuel filter can be a difficult proposition, but if you follow the steps below you'll be on your way to some useful DIY maintenance. Your vehicle manual should offer an estimate as to how often you should change your filter. Generally, fuel filters should be replaced every 2 years or 24,000 miles.
Tools you'll need include:
- New fuel filter
- New fuel line washers
- Open-end wrenches
- Screwdrivers
- Rags or old towels
- Safety glasses and vinyl gloves
- Car jack and jackstands
Above all, do not have any flammable materials or ignition devices (i.e., a cigarette lighter) near you during the process. For extra protection, you may want to keep a powder-type fire extinguisher handy.
1. Park your car in a level, well-ventilated area (so gas fumes can escape) and let the engine cool off.
2. If you have a fuel-injection vehicle, you will now need to depressurize your fuel system. First open your fuel filler cap on the outside of your car and loosen the cap until you hear the "hiss" of escaping pressure, but don't remove the cap. Then locate and remove your fuel pump fuse or relay in your fuse box (usually accessible from inside the car, on the driver's side). Start the engine and pull the fuse or relay out -- if you've pulled the correct one, the engine should die in a few seconds. Open your hood and disconnect the negative terminal on your car battery to avoid any accidental sparks that might ignite gas fumes.
3. Find the fuel filter -- its location can be different depending on your car, as it can be anywhere along the fuel line between your gas tank and engine. If you're stuck, check your vehicle manual or ask your local mechanic to look up the fuel filter location for your specific model. If you need to get under the car, raise it with a jack and prop it on jackstands.
4. Take a close look at the fuel filter and note its position -- when you are installing the new one, you'll want it pointed in the same direction. Depending on your car, clips, "banjo bolts" or other fasteners secure the fuel line to the filter. With your rag or towel at the ready, use a screwdriver or wrench to detach the fuel line from the filter, and quickly plug the open fuel line with the rag or towel.
5. After the fuel line is plugged, remove the fuel filter by unscrewing the attaching bolts. You will need to remove the fuel line coming out of the other end of the fuel filter -- follow step 4 again for this process. Take a moment to check the fuel lines -- if they look frayed, you may need to replace them.
6. Install the new fuel filter in the reverse order that you used to take it apart. Make sure that the filter is fitted snugly to the fuel lines to prevent leakage.
7. After the new fuel filter is installed, reconnect the negative terminal on your car battery, and reattach the fuel pump fuse/relay. Start your engine and let it run for a few minutes, checking to make sure that no fuel is leaking from your system. It may take a few tries to start the engine as fuel pressure is reestablished, so be patient.
© Copyright 2026 Military.com. All rights reserved. This article may not be republished, rebroadcast, rewritten or otherwise distributed without written permission. To reprint or license this article or any content from Military.com, please submit your request here.