How Does Plant Drill?
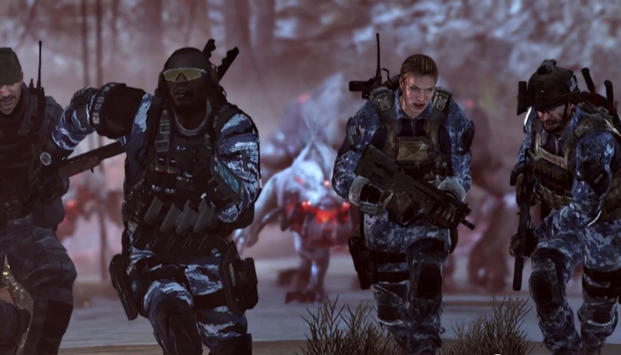
Maybe you've been cruising through the "Alien Extinction" mode of Call of Duty Ghosts. Maybe you're already rank 31, 20th Prestige and know that the "aliens" aren't so much "extra-terrestrial" as they are "ancient earthlings".
If you've reached that threshold, this guide's probably not for you. Who it is for, however, is those of you who have been getting regularly thrashed in Point of Contact, Nightfall, Mayday, and Awakening. This guide is loaded for bear with the proper loadouts and strategies (as well as some filler for you Relic-users) on how to make sure traveling from Point A to Point B isn't as painful as it used to be.
|
This Isn't Zombies Mode
Take a look at the lower-left corner of your HUD. Yeah, that's a health and armor gauge sitting down there, and it weirded me out initially, too. Putting it simply, unlike Treyarch's "two hits and you're down" zombies mode, you're going to be able to take a lot more hits before eating dirt. This can be further improved with the use of armor, which not only effectively doubles your resistance to damage (at max upgrade level), but also benefits your entire team when a cache of it is deployed.
In fact, with the exception of Strike Packages and Equalizers (also known as your beloved sentry gun), all deployed items benefit your team. When you've got money and feel it's necessary, throw down some armor, boosters, ammunition, or the like to your team. Just make sure it's okay with them, first. Many teams like to split roles among the group so that everyone can fit a specific archetype to the benefit of the team. Another handy tip to have on hand is money: holding the ADS and jump buttons for three seconds allows you to drop $1000 any single teammate.

|
Endurance Round
The most important thing to know about Call of Duty: Ghosts' Extinction mode is that matches last a long time. And by "long", I'm not talking 20-30 minutes. I'm saying a tough mission of Mayday can take anywhere between an hour and an hour and a half. These are long missions with not a lot of room for failure, so you need to come into each round prepared to do exactly what your team requires of you.
Challenges are an important feature of Extinction. They keep your squad ready for the next encounter and free of the fear of being under-equipped and ineffective. In short, do the challenges every time they pop up. Your team will be very thankful that you cooperated to get an extra skill point (and trust me, they will come in handy).
Another important thing to consider is classes. There are four classes in Extinction: Specialist (more bullet damage and obtains perks like Stalker and Sleight of Hand), Tank (more health and melee damage), Medic (passively heals teammates and gets the Agility perk), and the Engineer (more money, drill armor, better traps, and more explosive damage). Each of these four classes also has an upgrade to purchase in the Armory for 15 Teeth each. If you're going to be purchasing anything in the Armory at all, prioritize these skills.
|
Your Loadout
This'll go by quickly: despite being initially limited to one primary weapon and one sidearm, you can eventually upgrade towards having two primary weapons and one sidearm. This might seem great initially, but I've found more often than not that it's better just to focus on having a primary, a sidearm, and (depending on the mission) a Venom-X. If you're packing an LSAT and a Honey Badger, chances are the mightier LSAT is going to be seeing more use than the more specialized (and eventually worthless) Honey Badger. You want to be able to output damage quickly or fit the role of your class better, so choose weapons that reflect that.
Specialists are an easy choice: you're getting all the perks for better weapon handling as you upgrade that tree, so find your favorite LMG on the map and treat it like your baby. While the Chain SAW is without a doubt an effective crowd control weapon, those looking for more precision will find the M27 IAR (on Point of Contact) or LSAT (on all other maps) to be a destructive beast that hits hard and fires accurately at any range.
Tanks are similar. Even though you're not getting weapon handling perks, you can soak up a lot of damage, so focusing on things like LMGs and hard-hitting assault rifles are a smart choice. You can help out your team simply by drawing attention, so a weapon with fast maneuverability, like the MTAR-X, will help you take point and stay maneuverable.
Medics are an entirely different beast. Something to keep you safe up close or moving fast is crucial to allow you to fill the much-needed support role. SMGs and shotguns are very helpful for this reason, keeping you safe when you need them and allowing you to help teammates who'll pick off bigger targets.
Engineers should pick things that make the biggest boom (and assault rifles). Ignoring my previous advice, get that second primary perk unlocked so you can pair your weapon of choice (anything makes an engineer do their job better) with something like the MAAWS, Panzerfaust, or Kastet. As long as you can keep making explosions and pelleting enemies from afar, you'll be helpful.

|
Relics & How to Not Die With Them
If you're familiar with Halo's skulls, you probably know what to expect from Relics. Each time you hit a new Prestige level, you unlock one more slot with which to use a relic (up to 10 for now). Each Relic that you set active increases your earn XP by 20% (up to a total of 200% additional XP). Thing is, Relics don't make your missions any easier. In most cases, they actually make your job that much harder by removing helpful things like the ability to purchase weapons, deploy and take ammo, or even choose a class.
Basically, these are optional trinkets that were designed to completely and utterly screw you over. Pick your poisons wisely, and always make sure to inform your team before going into a mission with one.
You can review all available Relics here on the Call of Duty Wiki. I'll detail the most important ones down here:
- Pistols Only speaks for itself: nothing but the gun you start with can be used. This means you can't buy guns off the wall, pick them up out of lockers, or grab or craft the Venom-X. For this challenge, use the Magnum for accurate, heavy damage or the Grach for rapid-fire blasts of ammunition. You might find this easy to pair with an explosives-focused Engineer (take that grenade launcher equalizer for best effect).
- Mortal removes your ability to select a class. Make sure to plan this one out very well, because you're not going to have any skills to fall back on with this one. It's just you, your gun, and whatever ammo, strike packages, and equalizers you chose to bring along. That's it. Heaven forbid you pair this with the next one.
- No Machines, my personal favorite. This one takes away your strike packages and equalizers, meaning you've got only your class, pistol, ammo, and booster to upgrade and utilize. I don't rely on things like sentries, so this is probably the least-harmful Relic to my style of play.
- Stand Your Ground reduces movement speed and removes your ability to reload while sprinting. If you ask me, this one is great for players who like to reload cancel. While it takes away the On the Go perk all players start with, it gives you the ability to prematurely end a reload by sprinting, thus saving your neck when it's desperately needed.
- Earn Your Keep removes your ability to deploy and pick up ammo and team support items. This means once you've expended all the ammo in your gun's magazine, it's gone for good. This is without a doubt the hardest Relic to play with, so make sure it's the last one you active if you're looking through which ones to pick. Relics give bonus XP, but there's no bonus for being stupid.
|
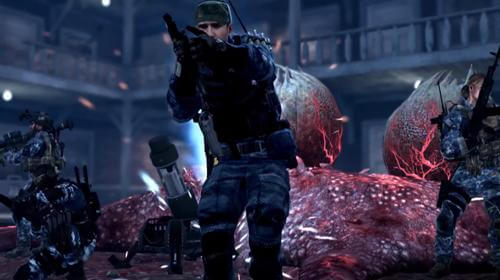
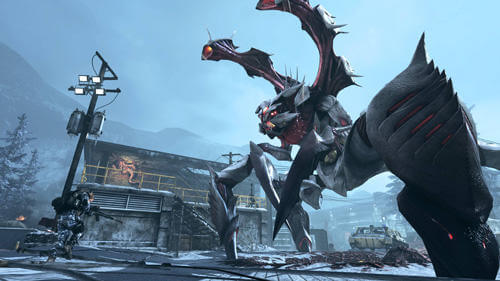
The Breeder & Kraken
These big guys aren't actually a huge threat; it's what comes into their arena during the fight that is a problem. Be very afraid of them, for sure, but don't throw your gun away in despair.
Tackling the Breeder is a tough battle, so just keep in mind a few things: shoot the eggs it launches at you (it stops aliens from hatching and gives you $200 per egg), go prone (if elevated) or take cover when the Breeder starts shooting, and play keep-away with all the Cryptids assaulting you during the battles with it. Also make note of the pods it launches; those can heal it, so take them out ASAP.
As for the Kraken, this is an easier beast to battle. Stick to the opposite side of the ship that the Kraken occupies, and its tentacles won't be able to hurt you. Then just shoot its cronies that flood the deck, and open fire with the mounted turrets on either side of the ship when it lowers its crest and begins to glow. This back-and-forth trading of blows should last roughly four times, so make sure your team is able to resupply your team with armor. Planting sentries nearby to dispatch Seeders and Seeder Spores is always helpful, too.
Don't Be a Dick
That's Wheaton's Law. Follow it, and your teammates will appreciate your abilities that much more.
Rhys Egner is a writer for Front Towards Gamer from Seattle. He likes comics, hates crowds, and loves gaming of all kinds.