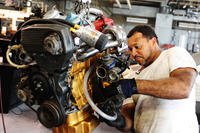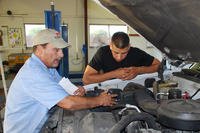
Depending on your vehicle, you'll usually need to change your oil filter every 20-30,000 miles -- it's a relatively simple process, as long as you don't mind getting a little down-and-dirty (be sure not to wear your Sunday finest for an oil change!). Follow the steps below for a painless oil filter change.
What you'll need:
- Socket wrench
- Pan to catch the oil
- Oil filter wrench (you can find this in most auto stores)
- Empty one-gallon containers with screw-on lids
- Funnel and a one-quart plastic storage bag
- Old newspapers and cloths
- New oil filter (see your vehicle's owner's manual for requirements)
- Enough engine oil to refill the engine (check owner's manual for oil grade and number of quarts needed)
- Car jack and jackstands
1. Park your vehicle in a flat spot, and make sure your engine hasn't been running for a few hours.
2. Open the hood of your vehicle, locate and open the oil filler cap on the top of the engine.
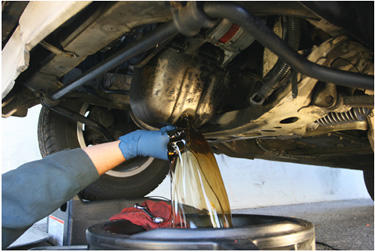
3. Locate the oil drain plug under the car. You may need to jack up your car and place it on jackstands if there's not enough room. The oil drain plug should be a large nut close to the ground, with a slim washer under it, located towards the back of the engine
4. Spread the newspaper under the car to protect against oil spillage. Slide your pan under the oil drain plug, and slowly remove the plug by turning it counter-clockwise using your socket wrench. If there is a circular paper or felt gasket around the plug, remove that as well. As the oil comes out, catch it with the pan -- you may have to reposition the pan depending on the angle of the oil. Using the funnel will also help control the flow of oil. Be sure to set the plug aside in a safe place, but if you do lose it in the oil, you can get it out using a magnet. The oil should drain in a few minutes.
5. Locate the oil filter -- this can be tricky as it is located in different places depending on your vehicle. Check your vehicle manual for location, and use your replacement filter as a reference as you find it. Use your oil filter wrench to remove the filter, and be careful for spillage, as there will be oil in the filter -- catch any drops with your pan. Be sure that you also remove the rubber gasket ring that comes off with the filter. Put the old filter and gasket ring in the plastic bag.
6. Unwrap the new filter and lubricate the new gasket ring on the new filter with fresh oil. You can also pour some oil into the filter -- this will help your vehicle regain oil pressure more quickly after installation.
7. Clean out the area where the new oil filter will sit, and then install the new lubricated filter and gasket ring, tightening the filter using the oil filter wrench. If your vehicle uses a paper cartridge filter with o-rings, be sure to also replace the o-rings.
8. Replace the drain plug -- you may need to install a replacement gasket or washer. The plug should be snug but not overly right.
9. Go back to the oil filler area on your engine and fill it up with new oil, using the funnel. Replace the fill cap and close the hood.
10. Start the engine, and make sure the oil pressure light goes off after start-up. Keep the car in park or neutral and check underneath for any leakage. Run the engine for a few minutes to make sure everything is running smoothly.
11. Pour the old oil from the pan into the one-gallon container(s). Bring the old oil and filter (in the plastic bag) to your local repair garage -- most of them can recycle the oil and filter. It is illegal to dispose of used motor oil improperly.