If your vehicle has been running roughly or seems to be losing power, it's possible that there's a lack of pressure in one or more of the cylinders. Without enough pressure, the fuel/air mixture doesn't ignite efficiently. If one or more cylinders has a good deal less pressure than the others, theengine doesn't run evenly.
So why wouldn't there be enough pressure? Because something is letting the pressure escape. Where can it go? Basically, three places: either out through one of the valve openings (because the valve is improperly adjusted or so worn that it doesn't close properly) or down past the rings on the piston or through a blown head gasket. These rings prevent the pressure at the top of a cylinder from escaping and the oil that lubricates the engine from entering a cylinder. When the rings get worn, oil gets in and pressure gets out.
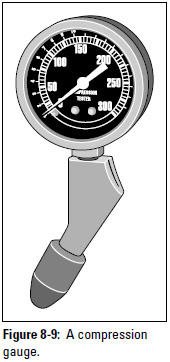
To determine whether pressure's escaping from the engine, you need to check the compression in the cylinders. For this job, you need a compression gauge (see Figure 8-9). This device tests the amount of pressure that the piston exerts on the fuel/air mixture before the spark plug fires the mixture. Your compression gauge can tell you whether one or more of your cylinders isn't firing efficiently and whether your rings or valves are worn or out of adjustment. These gauges don't cost much, and they're quick and easy to use. Some gauges screw into the spark plug opening, and others have to be held in place.
|
Poor Maintenance Results in Poor Performance Poor maintenance can cause the rings and cylinder walls to become thinner with wear, creating a gap between them that allows gases to bypass the rings. This reduces compression in the cylinders and you don't get as big a bang for your buck, so your vehicle loses power. Piston rings can be replaced, but it's an expensive job. Before you allow anyone to undertake a "ring job," check the compression to see whether your car really needs it and be sure that the vehicle's blue book value warrants such a costly investment. You may save money in the long run by trading in the old "fuel hog" for a more efficient vehicle. |
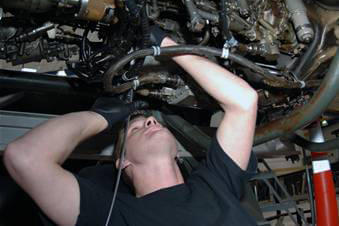
Tip: Checking compression is easier if you have someone to assist you, especially if your gauge needs to beheld in place (see Figure 8-10).

Caution: If your engine is covered by a shield, carefully remove any dust on the surface of the shield before you remove it. If removing the shield involves removing other parts that may be damaged in the process, have a professional check the compression for you.
Here's how to use a compression gauge:
1. Unless you buy or borrow a remote starter switch, have someone sit in the driver's seat with the engine off, the gearshift in Park or Neutral, and the parking brake on.
2. The next step depends on the type of distributor you have:
- On vehicles with distributors: Pull the big wire that leads to the coil from the center of the distributor cap, and lean the metal connector against an unpainted metal surface as far away from the spark plugs as possible.
- On vehicles with distributorless ignitions: Disconnect the electrical connector at the ignition control module. If you're not surewhat to disconnect, ask a mechanic.
3. For safety's sake, disable the fuel injection system so that gasoline mist won't spray out of the spark plug holes and possibly ignite. Remove the fuse labeled "Fuel Pump"; then start the car and let it run until it stalls from lack of gasoline. If you can't find the right fuse and you want to do a compression test anyway, be especially careful.
4. Before you remove them, label the boots that connect each spark plug wire and each spark plug so that you can remember which plug each boot was attached to. If you get the plug wires mixed up, you can really screw up your engine.
5. Remove all the spark plugs and lay them down in a clean place. Keep the labeled plugs in order to insure that you return each one to its original cylinder when the time comes.
6. If you have a remote starter switch, connect one clip to the battery's positive or "plus" terminal, and the other to small terminal of the starter solenoid.
7. Insert the compression gauge into the hole in the engine where the first spark plug screwed into the cylinder (refer to Figure 8-10).
8. If you don't have a remote starter switch, have a friend turn on the ignition until the engine cranks over about six times. Otherwise, press the button of the remote starter switch. Be sure to keep the gauge plug firmly inserted while the engine is cranking. (The car won't run because the engine has been disabled.)
9. Look at the gauge and write down the reading, which will be in psi (pounds per square inch). Then reset the gauge.
10. Repeat Steps 6 through 8 for each of the other cylinders and don't forget to reset the gauge and crank the engine each time.
11. After you've tested each cylinder, look at the readings.
The highest and lowest shouldn't vary by more than 15 percent. If one or more of the cylinders reads well below the rest, use a trigger-type oil can to send a good squirt of motor oil down the spark plug opening, and retest the compression of that cylinder with the gauge. If the reading is the same, the valves either are worn (and letting pressure escape) or are out of adjustment. If the reading rises dramatically after you insert the oil, you probably need new rings on the piston in that cylinder. If the pressure recorded by the gauges is less than 100 psi, the cylinder definitely isn't mechanically sound.
After you know what's wrong, you have to decide whether the problem is worth correcting. If your vehicle was on its way out anyway, it's time to get rid of it. If it's otherwise in good shape, you may want to have the engine rebuilt or replaced with a new or remanufactured one.
12. Replace each spark plug in the cylinder it came from.
Make sure that the ignition is off before you reconnect the spark plug wires, and be sure to put the correct spark plug wire boot back on each plug. Screw the plugs in by hand to avoid damaging the threads in the aluminum valve cover.
If the "Check Engine" warning light comes on after you perform a compression test and doesn't disappear in a couple of days, have it reset at the dealership.
From Auto Repair for Dummies, copyright © 2009 by Wiley Publishing, Inc., Indianapolis, Indiana. Used by arrangement with John Wiley & Sons, Inc.