If your vehicle has been overheating or doesn't warm up properly, you may need to replace your thermostat. This little gizmo simply stays closed and keeps the liquid in the engine block until the engine heats up. Although it's a simple device, it can malfunction.
Car Smarts: If the thermostat sticks in the open position, it doesn't keep the liquid in the engine long enough, so you have trouble getting your car warmed up. If the thermostat sticks in the closed position, the liquid isn't allowed to get to the radiator, and overheating results.
Because replacing the thermostat is quite simple and thermostats are quite inexpensive, you may want to try this task before you take more drastic measures:
- Locate your thermostat if you haven't already done so.
Most thermostats are located where the top radiator hose joins the engine, so these steps deal with this type. If your thermostat is in the bottom radiator hose, the principle is the same.
- Buy a new thermostat.
Supply the usual information (vehicle make, model, year, and so on) to the auto supply store. If you've done other work on your vehicle and have filled out the Specifications Record in Appendix B, you should know the drill by now.
- Unscrew the clamp that holds the end of the radiator hose where your thermostat is located.
- Pull off the hose.
Eco-Logic: Some fluid will escape, so have a clean two-gallon container handy to catch it, and return the fluid to the radiator when you finish the job. Or you can consider this a golden opportunity to flush your cooling system and change the coolant. Whatever you do, avoid spilling the coolant where animals and small kids can get to it.
- Remove the bolts that hold the thermostat housing in place, and lift out the old thermostat.
Caution: Compare the new thermostat and its gasket with the old ones. If the new thermostat and the gasket that's included with it aren't exactly like the old ones, go back to the store for the right ones.
There's a gasket around the hole where the thermostat was located — take that off, too. Scrape off any pieces of gasket that may be stuck, but be sure not to let these pieces fall into the hole!
- Lay the new gasket in place.
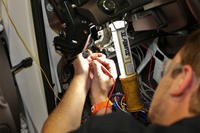
- Drop in the new thermostat, making sure to place the spring side down (see Figure 12-12); then replace the bolts.
- Replace the hose, and screw down the hose clamp.
Screw it down tightly but not tight enough to cut into the hose.
- Replace whatever fluid ran out of the hose by pouring it from the container into the radiator fill hole or coolant reservoir.
Caution: Be sure not to pour it on the ground where children and animals can be endangered by it. If you accidentally spill fluid, wipe it up thoroughly before hosing down the areaand place the rags in a sealed plastic bag before disposing of them.

From Auto Repair for Dummies, copyright © 2009 by Wiley Publishing, Inc., Indianapolis, Indiana. Used by arrangement with John Wiley & Sons, Inc.