The battery stores the electrical current that your vehicle uses to start and passes electricity along to the parts of your vehicle that need it to function, such as the ignition system, lights, radio, and so on.
A battery, like other parts of your vehicle, is subject to wear and tear and should be checked regularly. In particular, pay attention to the battery's trouble spots shown in Figure 2-6. Also, a battery that's kept clean should last longer than a cruddy one.
Caution: Before you work on your battery, be sure to read all the safety measures involved. Here's a rundown:
* Never work on a battery with a lit cigarette in your mouth. (For that matter, you should not only never smoke while working around your vehicle, you should never smoke at all!) Batteries are filled with sulfuric acid that generates hydrogen gas, so you need to be careful when working around them. If you get acid deposits on your skin or clothes, wash them off with water immediately.
* Disconnect the battery whenever you work on it, but be sure to shut the engine off first! On most modern vehicles, computers control functions of the engine, fuel and ignition systems, automatic transmissions, and other stuff. Therefore, when messing about with batteries and their cables, you need to be extremely careful not to inadvertently send a shot of unwanted voltage into one of the computers and destroy it. For this reason, it's important to disconnect the battery before you work on it.
* Always remove the negative cable from the battery if you plan to work on wiring under the hood. This will prevent you from possibly damaging electrical components or receiving a shock.
* When removing and replacing both battery cables, always remove the negative cable first and replace it last. If you attempt to remove the positive clamp first and your wrench slips and touches something metal, your wrench can fuse to the part like an arc welder.
* Tie the cables back while you work on the battery so that they don't flop back over onto the terminals. Don't allow anything made of metal to connect the terminal posts; this can damage the battery. If the cables are connected to the posts when something else interferes, you can destroy the onboard computers.
Tip: The radio may be affected by disconnecting the battery. As a precaution, you can maintain power while the battery is disconnected by making a cheap tool with a cigarette lighter socket and a 9-volt battery. (Most electronics stores can set this up for you.) Plug the 9-volt battery into your cigarette lighter socket before disconnecting the vehicle's battery, and remove it after the battery is back on.

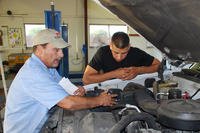
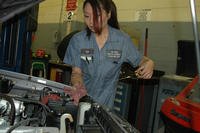
Don't let all the cautions that I list here turn you off the idea of checking your vehicle's battery. It's easy to check your battery if you follow these steps:
1. Locate your battery.
Figure 2-6 shows you what it looks like and what may be wrong with it.
2. If you see powdery deposits on the positive and negative terminals, clean them off.
The cruddy deposits that form in lovely colors on the top of your terminals are made by battery acid. Before you clean this stuff off, remove the cables from both terminals by undoing the nut on each cable clamp and wiggling the cable until the clamp comes off the terminal post.
Caution: This bears repeating: Always remove the cable clamp from the negative terminal first. (It's the one that's marked with a “–” sign.) When you're through with the job, replace the positive cable first and the negative cable last.
To brush the deposits off the terminal posts and cable clamps, sprinkle some baking soda straight from the little yellow box that keeps your refrigerator smelling nice onto each terminal, dip an old toothbrush or disposable brush in water, and scrub the deposits away.

Tip: If your cables and clamps won't clean up completely with baking soda and water, rotate an inexpensive battery terminal brush (see Figure 2-7) on each terminal to shine it up and ensure a good, solid electrical connection. You can also shine up the insides of the cable clamps with the clamp cleaner that's usually sold as one unit with the brush. A soapless steel wool pad may also do the job.
3. Dry everything off with a clean, disposable, lint-free rag.
Remember: Try to avoid getting the powdery stuff on your hands or clothes. If you do, wash it off with water right away, and neither you nor your clothes will be damaged.
4. Reconnect the terminals to the battery, replacing the positive cable first and the negative cable last.
After the battery terminals are reconnected, coat the terminals with thick automotive grease or petroleum jelly to prevent corrosive deposits from forming again.
5. Examine the battery cables and clamps to see whether they're badly frayed or corroded.
If the damage looks extensive, the cables and clamps may need to be replaced; otherwise, the battery may short-circuit, which could damage onboard computers. Have a professional check it out.
6. If you've been having trouble starting your engine, if your headlights seem dim, or if the battery is old, check to see whether the electrolyte in the battery is strong enough. If it's weak, the battery may need to be recharged or replaced before it dies and leaves you stranded.
Ask your local service station to test the battery (assuming you trust them not to sell you a new one you may not need).
7. Check the battery case and the terminals.
If you see major cracks in the battery case or obvious terminal damage, replace the battery regardless of its electrical performance.
From Auto Repair for Dummies, copyright © 2009 by Wiley Publishing, Inc., Indianapolis, Indiana. Used by arrangement with John Wiley & Sons, Inc.